Sep 27, 2026 / By Lux Carbon / in Carbon Fiber Guides
The refreshed Model 3, commonly called Highland, changed visible front and rear bodywork. A seller listing that says only “Model 3 2017+” does not establish compatibility with every refresh, bumper design or Performance version. This guide provides an evidence checklist rather than pretending that any one carbon kit fits every Model 3.
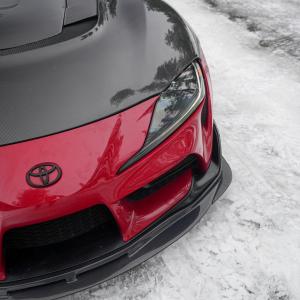
Start with the actual parts: browse relevant carbon parts. Photos below illustrate the topic; they do not prove the fitment or construction of any particular seller item.
.jpg)
Choose the component that matches the exact vehicle and installation conditions, then verify underside geometry, hardware and finish using real product photographs. Do not infer structural strength, aerodynamic performance or fitment from a carbon-look surface. The checks below show what evidence to request before paying and what to inspect before irreversible installation.
Record model year, market, factory variant and actual bumper photographs. Do not rely only on the registration date: market launch and manufacturing transitions can differ. Compare headlamp and tail-lamp shapes, bumper geometry and the lower rear diffuser area with the listing’s installed reference.
The existing Lux Carbon guide for the earlier Model 3 is useful for that generation, but its example kit should not be treated as a Highland part. Keep generation-specific URLs and images in separate purchase notes.
New front-end styling changes the edge that an aftermarket splitter follows. Ask for a photo of the actual part fitted to the specific Highland trim; the seller should show the outer corners, center section and underside mounts, not just a cropped front view.
Confirm whether the lip is one-piece or segmented and whether original lower fasteners can be reused. A lip with “Tesla Model 3” in the title may still be designed around the earlier bumper. Do not force mounting holes to line up.
Rear bumper inserts, reflectors and optional aerodynamic trim can differ by version. Before ordering a diffuser, photograph the original lower valance directly from behind and underneath. Verify whether the proposed part is a replacement, an overlay or a full lower-bumper piece.
If a component changes an electrical feature, ultrasonic/other sensor mounting or rear camera sightline, obtain model-specific integration guidance. Composite material and its shape can affect device performance; do not block any original sensing surface.
An adhesive spoiler must match the specific trunk curvature and the local surface finish. A factory lip, if present, can change the available bonding area. Request end-gap photos and backing details before assuming a spoiler designed for the earlier car can be transferred.
Follow the supplied adhesive conditions and cure time, and confirm trunk opening, lamp visibility and any integrated equipment. A tall wing is a structural mounting project rather than a cosmetic tape accessory.
Replacement caps and add-on shells differ. Compare the mirror housing, signal aperture, cameras and folding clearance. Some listings divide options by LHD and RHD or market equipment; verify these details directly with the seller.
Dry-fit without removing tape liners or OEM clips. If the replacement uses clips, inspect their exact placement; forcing a mismatched clip can damage the housing.
Send front, rear and both mirror photos along with model-year and trim details. Ask the seller to identify the exact product variant and provide one unedited fitted example on the same generation. Keep written confirmation and save all original boxes until inspection.
The lowest-risk approach is to buy only when the seller can identify actual fitment, material, hardware and the product’s current return process.
| Check | Evidence to keep |
|---|---|
| Vehicle | Production year, version, market and current bumper or body specification |
| Part | Exact variant, dimensions, backside photos and supplied hardware |
| Material | Construction description, finish and intended exterior use |
| Installation | Manufacturer method, dry-fit photos and service clearance |
| After-sale | Shipping inspection record, current seller terms and return procedure |
Front Lips & Splitters · Rear Diffusers · Mirror Covers · Carbon Fiber Body Kits.
Do not assume so. The front bumper is different; require specific confirmation.
No. Market and version details matter; check the actual vehicle.
Only with manufacturer confirmation of trunk geometry, backing and installation requirements.
Do not assume a range improvement without credible model-specific testing.
A simple designed add-on may be straightforward, but camera/clip-sensitive replacement work warrants care.
Full bumper views, lower mounting areas, rear valance, mirror details and a fitted reference on the same version.
Use actual part and vehicle evidence to make the purchase decision. Confirm the full contents and installation method with the seller, preserve the original components when feasible, and stop work if the fitment or mounting is not as specified. The linked product categories show the currently listed choices; compatibility must be established for the exact item, not inferred from this editorial guide.
Reader-question context: owner discussion 1 · owner discussion 2 · owner discussion 3. These discussions identify recurring questions; they are not technical installation authority.
Oct 03, 2026 by Lux Carbon
Oct 03, 2026 by Lux Carbon
Cookie preferences