Sep 27, 2026 / By Lux Carbon / in Carbon Fiber Guides
A front lip changes the lowest, most vulnerable point on many cars. An expensive carbon piece can be a sensible daily-driver upgrade, but only if its projection and effective clearance match the roads the vehicle actually uses. Owner discussions about steep driveways, speed bumps and replacement cost are a useful reality check: the first buying question is not how deep the lip looks in a product photograph, but whether it can survive the normal route home.
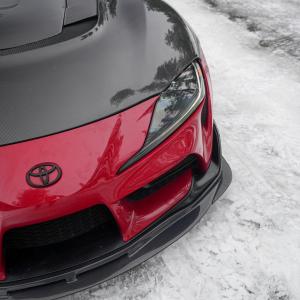
Start with the actual parts: browse carbon fiber front lips. Photos below illustrate the topic; they do not prove the fitment or construction of any particular seller item.

Choose the component that matches the exact vehicle and installation conditions, then verify underside geometry, hardware and finish using real product photographs. Do not infer structural strength, aerodynamic performance or fitment from a carbon-look surface. The checks below show what evidence to request before paying and what to inspect before irreversible installation.
Park on level ground at normal operating load and tire pressure. Measure the height from road to the existing bumper’s lowest leading point, then measure how far the proposed lip projects ahead of the contact point. A longer forward projection can scrape on an incline even when vertical drop looks modest. Use the installer’s real underside photograph rather than relying on a front three-quarter glamor image.
Take photographs of the driveway transition from the side and note where the current bumper already touches. A temporary cardboard outline held at the expected lip profile, without driving on public roads, can help visualize the contact envelope. Suspension lowering, larger wheels, tire wear, loaded luggage and a steep garage ramp all change the result. No universal “safe millimeter” applies to every car.
A cosmetic lip follows the bumper perimeter; a functional splitter projects horizontally and may require structural support. Calling an unsupported carbon lip a race splitter does not prove downforce. Inspect the backside for molded mounting areas, fastener holes and reinforced corners. Ask whether the quoted part is CFRP, a carbon skin over fiberglass or carbon-look plastic.
For a car driven through snow, gravel or rough urban roads, consider whether a less projecting design or replaceable lower wear strip is available for that particular component. An unapproved strip or random bolt can concentrate stress in a laminate; use only the component maker’s permitted accessory and fixing method.
Ask the installer to photograph the centered lip from the front, each end, underneath at the fixing points and the side profile at ride height. Dry-fit without removing protection from adhesive. The outer ends should align without being twisted into place; the center should not bow away from the bumper. A larger mounting gap is a fitment problem, not a reason to add arbitrary screws or stronger glue.
Preserve the factory undertray, cooling openings and any relevant sensors. Locate original bumper fasteners and check whether a proposed hole lands in plastic trim or an unsuitable structural area. When the component has engineered mounting brackets, use the exact supplied hardware and tightening guidance. The general installation checklist is linked below.
Approach ramps and speed bumps slowly within local traffic rules, with awareness of other road users. Where safe and legal, a slight angle can reduce the simultaneous rise required at both front corners, but it is not a cure for insufficient clearance and should never put the vehicle into oncoming traffic. Avoid pulling fully over parking blocks; they are often higher than the lip can clear.
Keep a photo of the underside taken immediately after installation. Comparing the same areas after seasonal driving distinguishes superficial contact on a sacrificial surface from a progressively opening crack at a mounting tab. Washing the underside removes dirt that can hide damage.
A scuff limited to protective film or topcoat is different from a white stress line, exposed fiber, delamination or an attachment that has moved. Do not continue driving with a loose lip that can detach into traffic. Photograph both faces, edges and every mount; gently examine only after the part is safely removed if removal is appropriate under the maker’s instructions.
A qualified composite repairer can assess whether a damaged piece is repairable and whether restoring the appearance is economical. Sanding until a dark weave disappears can destroy the fibers; DIY cosmetic polish cannot restore a cracked structural laminate. A visibly fractured mount should be treated as a safety issue rather than hidden with resin.
Confirm exact model year, bumper variant and whether a factory aero option is present. Ask for the actual projection, underside photos, hardware list, finish system, availability of a replacement piece and written shipping-damage process. Keep the old bumper or trim intact when possible, and book workshop time only after the shipment has been inspected.
For matched proportions, compare the front profile with side extensions rather than independently choosing the lowest part in each category. An attractive package remains useful only when it permits ordinary service and daily access.
| Check | Evidence to keep |
|---|---|
| Vehicle | Production year, version, market and current bumper or body specification |
| Part | Exact variant, dimensions, backside photos and supplied hardware |
| Material | Construction description, finish and intended exterior use |
| Installation | Manufacturer method, dry-fit photos and service clearance |
| After-sale | Shipping inspection record, current seller terms and return procedure |
Front Lips & Splitters · Side Skirts & Rocker Panels.
There is no universal number. Measure the car at its actual ride height and model the specific driveway and lip projection.
PPF can reduce cosmetic stone-chip damage, not prevent laminate fracture from a significant impact.
Only if the component maker explicitly specifies that method. Many projecting parts need mechanical support.
Consider replacement cost, material, clearance and mounting design. Do not substitute a weak or unsupported part purely on price.
Only appropriate clear-coated cosmetic defects may be polishable; exposed fiber and cracks need assessment.
No. Aerodynamic effect requires validated geometry and installation, not just a carbon material label.
Use actual part and vehicle evidence to make the purchase decision. Confirm the full contents and installation method with the seller, preserve the original components when feasible, and stop work if the fitment or mounting is not as specified. The linked product categories show the currently listed choices; compatibility must be established for the exact item, not inferred from this editorial guide.
Reader-question context: owner discussion 1 · owner discussion 2 · owner discussion 3. These discussions identify recurring questions; they are not technical installation authority.
Oct 03, 2026 by Lux Carbon
Oct 03, 2026 by Lux Carbon
Cookie preferences