Sep 27, 2026 / By Lux Carbon / in Carbon Fiber Guides
Toyota GR Supra buyers often see listings that combine A90, A91, J29 and broad production years. Those terms are helpful search identifiers but not substitutes for the actual bumper, model-year equipment and installed parts. The purpose of this checklist is to prevent a visually close carbon component from becoming an expensive drill-and-trim exercise.
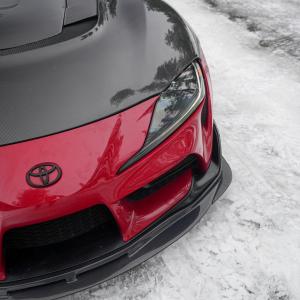
Start with the actual parts: browse relevant carbon parts. Photos below illustrate the topic; they do not prove the fitment or construction of any particular seller item.
.jpg)
Choose the component that matches the exact vehicle and installation conditions, then verify underside geometry, hardware and finish using real product photographs. Do not infer structural strength, aerodynamic performance or fitment from a carbon-look surface. The checks below show what evidence to request before paying and what to inspect before irreversible installation.
Record the exact production year, market, trim and vehicle body details shown on the vehicle paperwork. A90/A91 and J29 labels can be used inconsistently by aftermarket sellers; request confirmation for the precise car rather than treating the words as a guaranteed compatibility certificate.
Photograph the front bumper, lower grille, rear bumper, exhaust outlets and trunk edge in daylight. Show any factory aero option, parking sensors or installed aftermarket part. The actual attachment points matter more than the vehicle name in a generic stock photo.
A Supra sits low enough that driveway approach is relevant before adding any front projection. Measure ride-height clearance and compare the actual lip outline to the original bumper. Confirm whether the package includes a center blade, corner extensions or separate canards and whether its fixing points reuse factory locations.
A three-piece part may be easier to handle during transport but can show visible alignment seams. A one-piece part may have a cleaner line yet demand more careful shipping and fitting. Neither configuration is inherently compatible with every Supra bumper.
View the car side-on: the skirt should connect the apparent lower line of the front and rear without bowing between mounts. Verify door opening, road clearance and whether workshop jacking points stay usable. Photograph the supplied backside and determine whether the item replaces a factory trim piece or adds over it.
Set the finish specification across both sides. Mismatched weave becomes visible along the car’s long straight sill line.
Many buyers change tips or a complete exhaust before purchasing rear carbon. Record outlet centerlines, tip envelope, projection and hot-surface clearance. Ask for actual installed photos with the same exhaust configuration, not a similar Supra photo that happens to have quad tips.
Do not delete factory heat shields, obscure reflectors or assume that cosmetic rear fins create a measured aerodynamic benefit. An installer should check mechanical retention and movement clearance on a cool vehicle.
A compact lip, high-kick spoiler and tall wing change the trunk silhouette differently. Ask if the item is adhesive-bonded or mechanically mounted and whether the complete hardware and template are included. Do not convert a mechanically mounted wing into tape-only installation.
Dry-fit at both tips and centerline, inspect trunk opening and the rear camera/visibility context, and retain OEM parts until acceptance. The general spoiler mounting guide explains the different loading mechanisms.
Choose an OEM+ or more aggressive direction, then map four components with actual URLs, finishes and clearances. Have the seller confirm exact model-year fitment and contents in writing. Ask for unedited close-ups of the edges and rear face. A package advertised as “full carbon” should still disclose substrate and mounting construction.
After delivery, inspect all four sections before booking installation. A replacement or return becomes harder after irreversible modification.
| Check | Evidence to keep |
|---|---|
| Vehicle | Production year, version, market and current bumper or body specification |
| Part | Exact variant, dimensions, backside photos and supplied hardware |
| Material | Construction description, finish and intended exterior use |
| Installation | Manufacturer method, dry-fit photos and service clearance |
| After-sale | Shipping inspection record, current seller terms and return procedure |
Front Lips & Splitters · Rear Diffusers · Spoilers & Wings · Carbon Fiber Body Kits.
No. Confirm actual bumper and production-year details with the seller.
Not as proof for your aftermarket exhaust; compare measurements and configuration.
Check the product contents; do not infer quantity from a photo.
Projection and geometry vary by product; there is no universal rule.
Yes, but appearance and finish can differ; inspect representative samples.
Exact car details and clear photos of bumper, rear tips, trunk and existing aero.
Use actual part and vehicle evidence to make the purchase decision. Confirm the full contents and installation method with the seller, preserve the original components when feasible, and stop work if the fitment or mounting is not as specified. The linked product categories show the currently listed choices; compatibility must be established for the exact item, not inferred from this editorial guide.
Reader-question context: owner discussion 1 · owner discussion 2. These discussions identify recurring questions; they are not technical installation authority.
Oct 03, 2026 by Lux Carbon
Oct 03, 2026 by Lux Carbon
Cookie preferences